
 Before You Begin
This 10 minute tutorial shows you how to install the sample
dataset in the hr schema, and create a REST
Enabled SQL service reference from the obe schema
to the hr schema. This is the third tutorial in
the series Oracle Application Express 18.1: Using REST
Enabled SQL Service Reference. Read the tutorials in
sequence:
- Oracle Application Express 18.1: Using REST Enabled SQL Service Reference (1 of 4)
- Oracle Application Express 18.1: Using REST Enabled SQL Service Reference (2 of 4)
- Oracle Application Express 18.1: Using REST Enabled SQL Service Reference (3 of 4)
- Oracle Application Express 18.1: Using REST Enabled SQL Service Reference (4 of 4)
Background
In this OBE, you will learn how to install the sample dataset Project
Data in the hr schema, and create a REST
enabled SQL service reference to the hr schema
from the obe schema.
What Do You Need?
- Install the latest version of the Oracle VM VirtualBox
- Download and import the Database App Development VM in to
the Oracle VM VirtualBox
Note: SQL Developer 4.2, Oracle Database 12c, and Oracle Application Express 18.1 are installed in the Database App Development VM
 Install
Sample Dataset in the hr Schema
Install
Sample Dataset in the hr Schema
In this section, you will learn how to log in to the hr
workspace and install the sample dataset Project Data.
To install the sample dataset:
- In the Database App Development VM, click Start to open the browser.
- Click the APEX bookmark browser to sign in to Oracle Application Express.
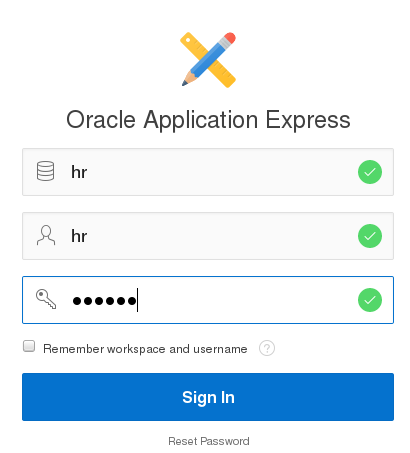
- On the Oracle Application Express sign in page, enter the following details:
- Workspace: Enter
hr - Username: Enter
hr - Password: Enter
oracle - Click Sign in.
- In the Oracle Application Express home page, click SQL
Workshop.
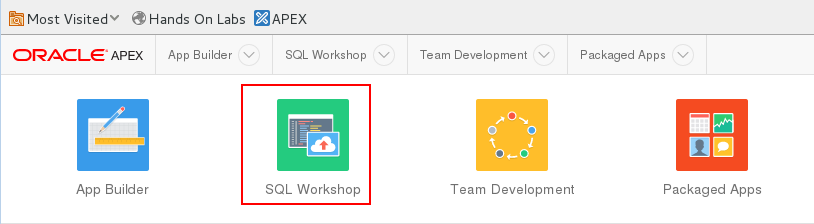
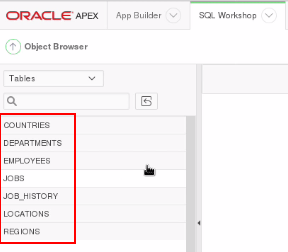
Description of the illustration sql_workshop.png - Click Object Browser. Make a note of the tables that
are listed under Object Browser here.
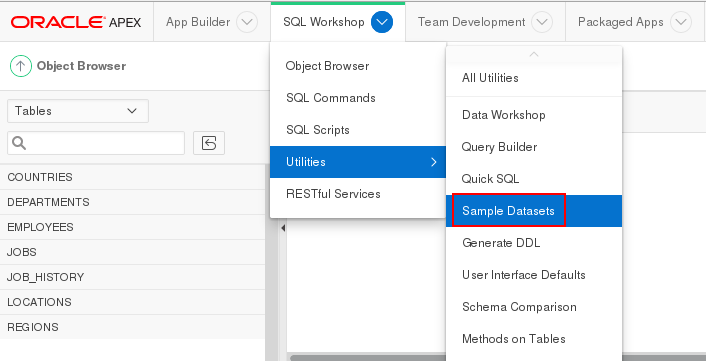
Description of the illustration sample_data_initial.png - Click the down arrow next to SQL Workshop, select Utilities
and click Sample Datasets. The Sample Dataset
dialog opens.
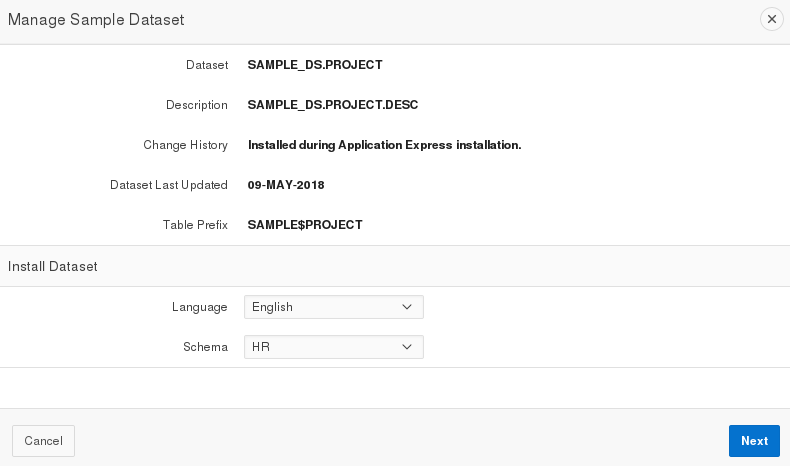
Description of the illustration sample_datasets.png - In the Sample Datasets page, click Install in the
Project Data row. The Manage Sample Dataset dialog
opens.
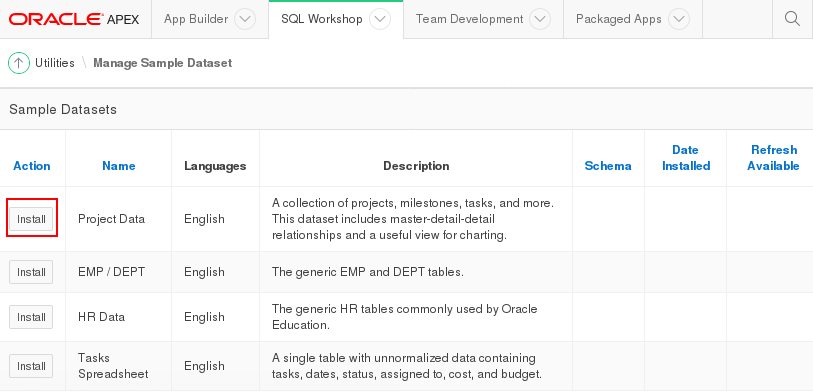
Description of the illustration install_project_data.png - In the Manage Sample Dataset dialog, click Next.
Description of the illustration manage_sample_dataset1.png - In the Load Sample Dataset dialog, click Install
Dataset.
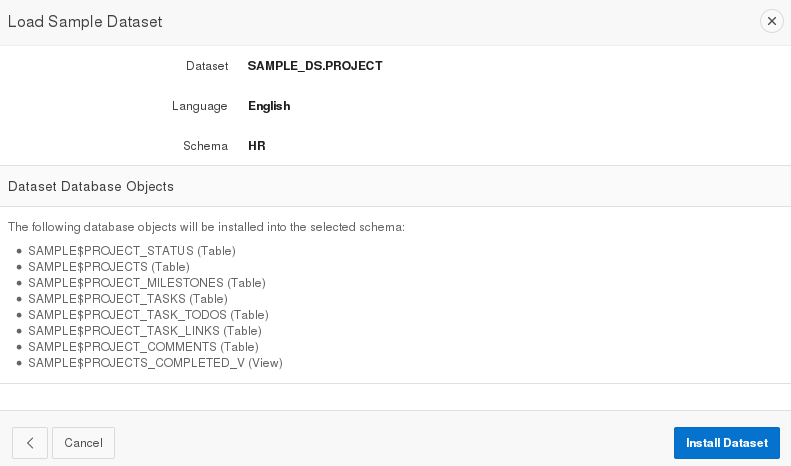
Description of the illustration load_sample_dataset.png - Once the Project Data dataset installs, the Load Sample
Dataset - Results dialog opens. It displays the schema and the
objects that are present in the schema. At this point, you can
create an application or exit. In this tutorial, we will
create the application later. Click Exit. This
completes the task of installing the dataset Project
Data.
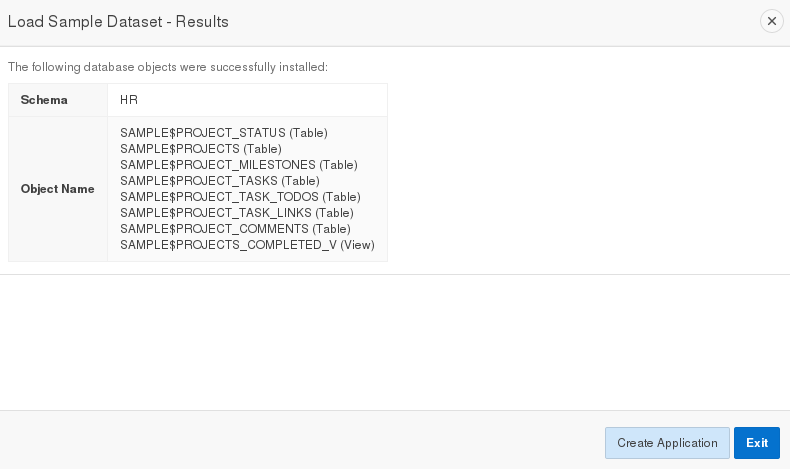
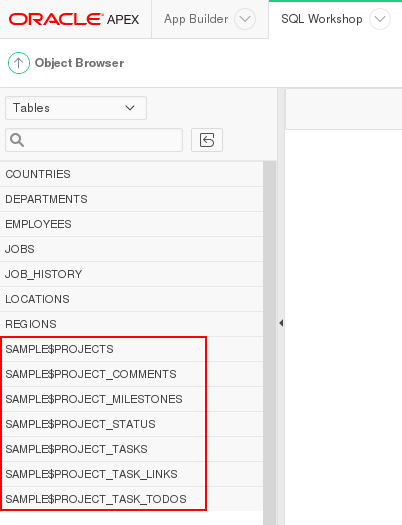
Description of the illustration load_sample_dataset_results.png - Go to SQL Workshop and click Object Browser.
Notice that the Project Data tables now display under Object
Browser, as shown in the screenshot.
Description of the illustration sample_data_loaded.png - Sign out of the hr workspace. This completes the task of installing the sample dataset Project Data in the hr schema.
 Create
a REST Enabled SQL Service Reference
Create
a REST Enabled SQL Service Reference
In this section, you will learn how to sign in to the obe
workspace , and create a REST Enabled SQL Service reference to
the hr schema. To create a REST Enabled SQL
Service reference:
- Log in to the
obeworkspace using the following credentials: - Workspace: Enter
obe - Username: Enter
obe - Password: Enter
oracle - Click Sign In
- In the Oracle Application Express home page, click SQL Workshop.
- Click Object Browser and check the tables that are
listed in the
obeschema. Notice theobeschema contains OEHR tables, and not the SAMPLE tables that you noted in the hr schema.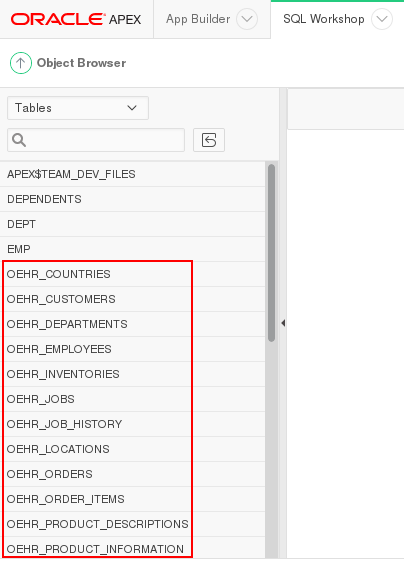
Description of the illustration objects_obe_schema.png - Now, you will create a REST Enabled SQL reference to the
hrschema from theobeworkspace here. Click App Builder and click Workspace Utilities. - In Workspace Utilities, click REST Enabled SQL Services.
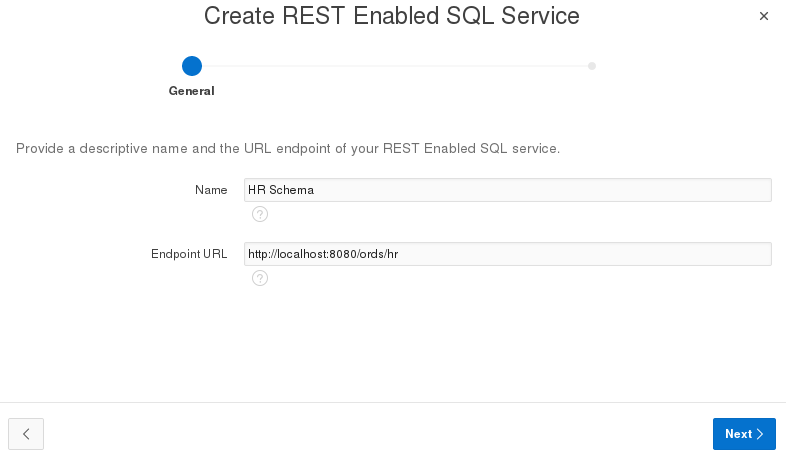
- Click Create. The Create REST Enabled SQL Service dialog opens.
- In the Create REST Enabled SQL Service dialog, enter the following details:
- Name: Enter
HR Schema - Endpoint URL: Enter
http://localhost:8080/ords/hrNote: In this url,
hris the schema name. - Click Next.
Description of the illustration create_rest_endpointurl.png - In the Create REST Enabled SQL Service - Authentication dialog, enter the following details:
- Credentials: Select Enter new
- Credential Name: Enter
HR Credentials - Authentication Type: Select Basic Authentication
- Client ID: Enter
hr - Client Secret: Enter
oracle - Verify Client Secret: Enter
oracle - Click Create. The REST Enabled SQL service
is created, and the connection is tested. You will see the
following message once the service is created and tested
successfully.
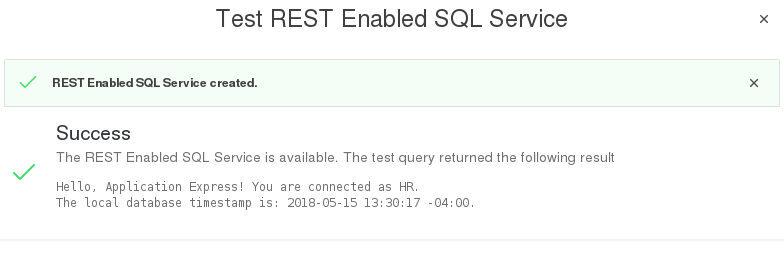
Description of the illustration rest_enabled_ref_success.png - Click Close. This completes the task of creating the
REST Enabled SQL service reference to the
hrschema from theobeschema. - Click App Builder tab to go to the Application Builder home page. You are now all set to create a new application using the REST Enabled SQL service reference to the hr schema.
