Before You Begin
Purpose
In this tutorial, you learn how to perform the following tasks in Oracle Application Express 5.1:
- Install and run a Productivity application from the Packaged Apps gallery.
- Unlock the Productivity application for editing.
- Install and run a Sample Application from the Packaged Apps gallery.
Time to Complete
Approximately 25 minutes.
Background
Oracle Application Express is a rapid web application development tool for the Oracle database. Using only a web browser and limited programming experience, you can develop and deploy professional applications that are both fast and secure. Oracle Application Express is available with the Oracle Database, whether it's on-premises or in an Oracle Database Cloud Service.
Oracle Application Express includes two types of Packaged Apps:
- Sample applications
- Productivity applications
Both the Sample and Productivity applications are fully functional applications that have been designed to address a specific business need. The main difference between a Sample and Productivity application is the level of support. By default, Sample applications are fully editable. In contrast, you must unlock a Productivity application before you can edit it. Unlocking a Productivity application makes it ineligible for future upgrades or support by Oracle Support.
Please keep in mind the following while running this tutorial:
- Logging into your Oracle Application
Express workspace: Your Oracle
Application Express workspace may reside in an
on-premises Oracle Database or in Oracle Database
Cloud Services. The login credentials differ
depending on where your workspace is located:
- Logging into Oracle Application Express in a Oracle Database Cloud Service: Reference the Oracle Help Center for your Oracle Database Cloud Service. To do this, go to the Oracle Help Center for Cloud, and select Platform or Infrastructure (depending on your service). From here, select your Database Cloud Service and the Get Started page will appear.
- Logging in to Oracle Application Express on-premises: From your browser, go to the location of your on-premises installation of your Oracle Application Express workspace provided by your Workspace Administrator.
- Application ID: Your Application ID may be different when compared to the screenshots in this tutorial. Your Application ID can be any value assigned automatically while creating the application.
- Schema: If you are accessing an Oracle Application Express workspace in Database Schema Service, you have one schema assigned to you with a schema name that you cannot change. If you are accessing the workspace in an on-premises Oracle database, you may have more than one schema assigned to your workspace by the Oracle Application Express Instance Administrator.
What Do You Need?
- Visit Oracle Help Center for Cloud.
- Access to an Oracle Database 11g or later release, either on-premises or in a Database Cloud Service.
- Oracle Application Express Release 5.1 into your Oracle Database (for on-premises only).
- At least one Oracle Application Express user. To create a user, see Creating New User Accounts in Oracle Application Express Administration Guide.
Installing a Productivity Application from Packaged Apps
-
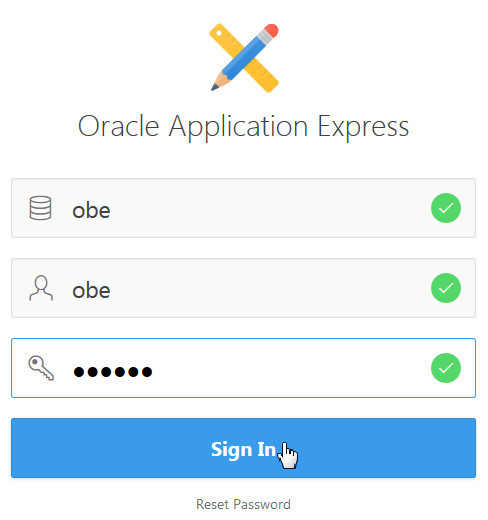
In the Application Express login page, enter the following login credentials and click Sign In:
Workspace: obe
Username: obe
Password: oracle
Description of this image -
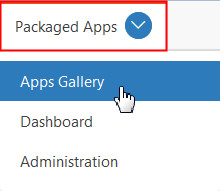
From the Oracle Application Express home page, click the down arrow next to the Packaged Apps tab and select Apps Gallery.
Description of this image -
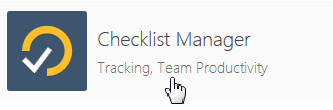
Locate and click the Checklist Manager application icon.
Description of this image -
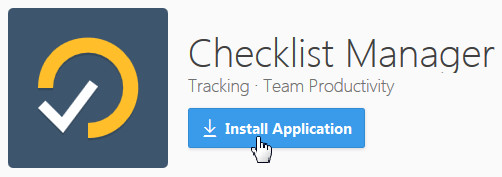
The Checklist Manager productivity application details are displayed. Click Install Application.
Description of this image -
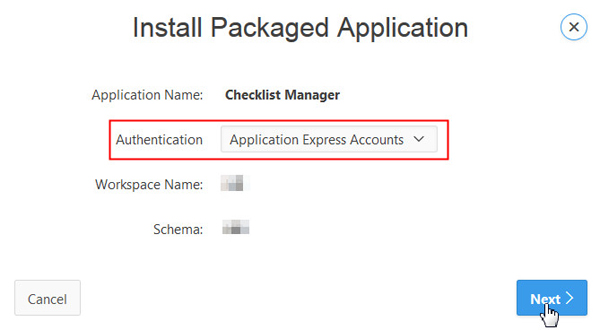
Select Application Express Accounts for Authentication, and click Next >.
Description of this image -
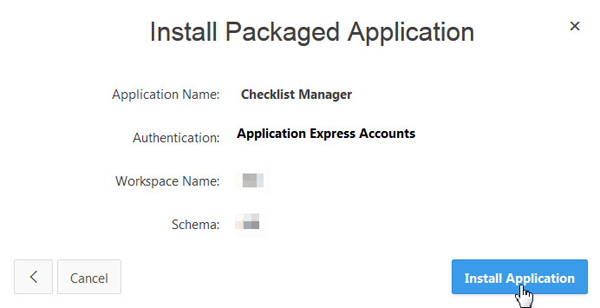
Click Install Application.
Description of this image -
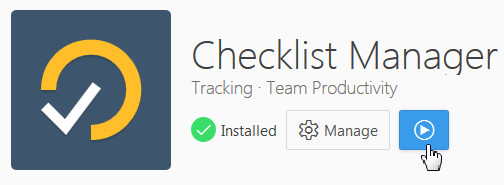
The Checklist Manager application is installed. Click the Run icon.
Description of this image -
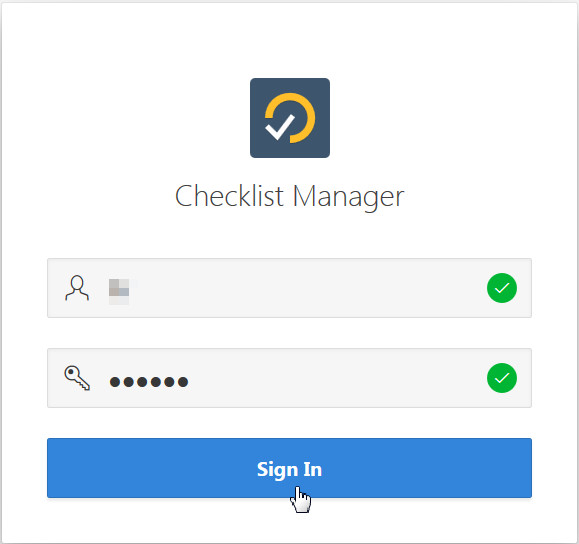
Enter your Oracle Application Express credentials, and click Sign In.
Description of this image -
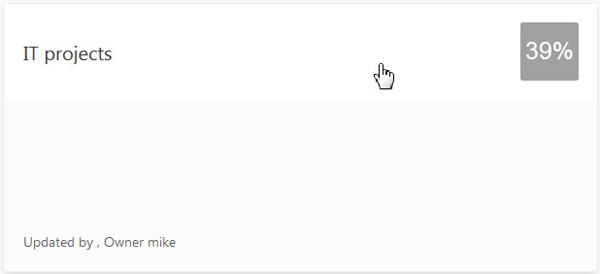
The Checklist Manager application's home page is displayed. Click the IT Projects 39% checklist.
Description of this image -
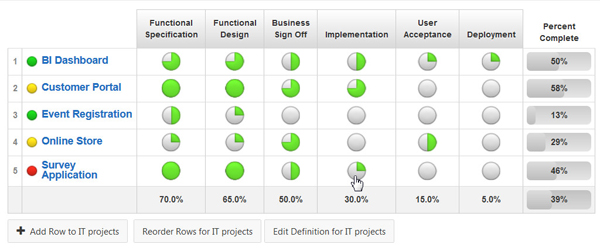
This checklist represents IT projects. Each row represents a project and each column represents a task for that project. To change the Percent Completed of a task, click the respective circle.
Description of this image -
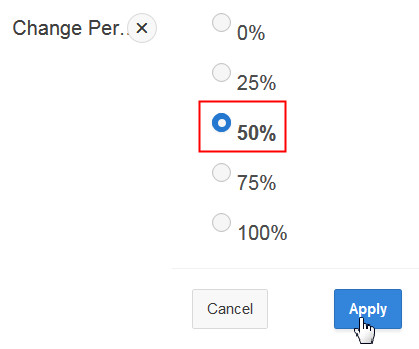
The Change Percent dialog opens. Select a different percent value, and click Apply.
Description of this image
Unlocking an Installed Productivity Application
-
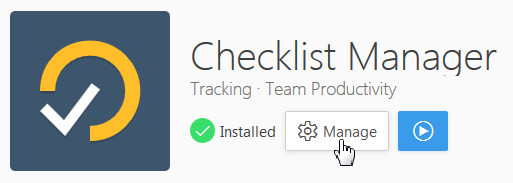
Go back to the Oracle Application Express window where the Packaged Application details page is currently open with the details of Checklist Manager. Click Manage.
Description of this image -
Click Unlock.

Description of this image -
Click Unlock Application.

Description of this image -
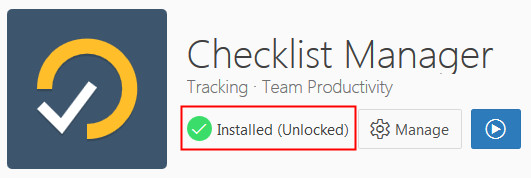
The application shows as Installed (Unlocked) in the Packaged Application Details page.
Description of this image
Installing and Running a Sample Application from Packaged Apps
-
Click the Packaged Apps Gallery breadcrumb.

Description of this image -
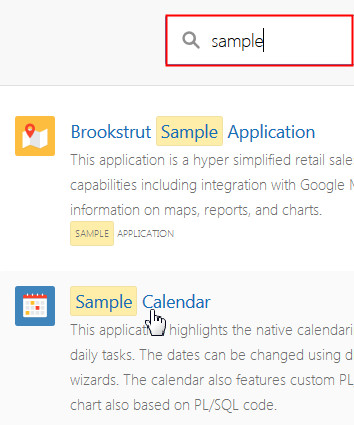
Enter Sample in the search bar, press the Enter key. Locate, and click Sample Calendar.
Description of this image -
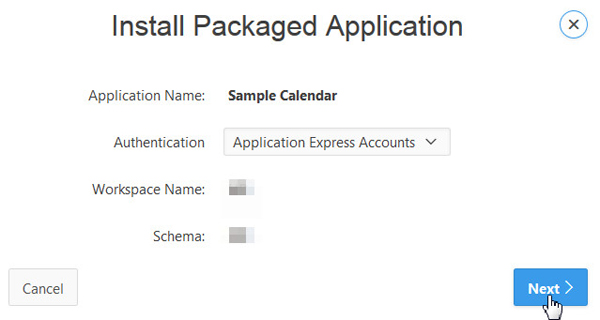
The Sample Calendar sample application details are displayed. Click Install Application.

Description of this image -
Click Next >.
Description of this image -
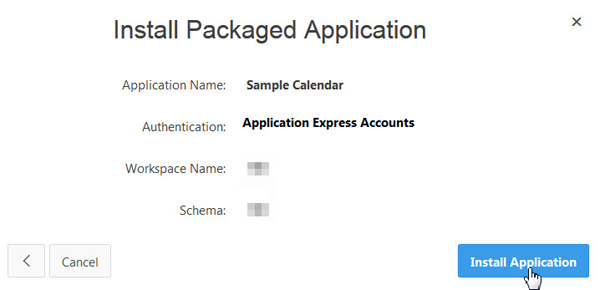
Click Install Application.
Description of this image -
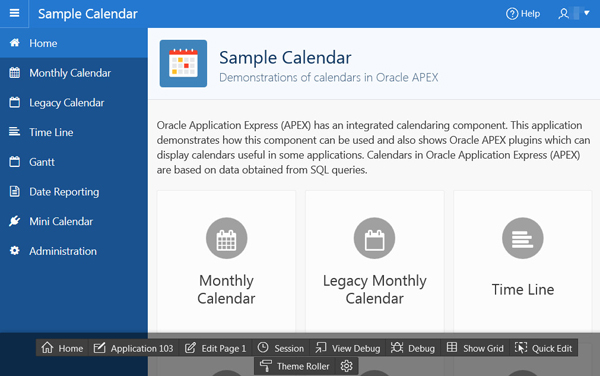
The application shows as Installed (Unlocked) in the Packaged Application Details page. Notice that this application is unlocked by default. Click the Run icon.

Description of this image -
The Sample Calendar application's home page is displayed. Notice the developer toolbar below the home page. This shows that the application is already unlocked.
Description of this image