Before You Begin
Purpose
This tutorial shows you how to add security to your application using Oracle Application Express.
Time to Complete
Approximately 40 minutes.
Background
In this tutorial, you first create Application Express users. Then you create an Access Control page in the application and restrict only these users to be able to access certain components in the application.
What Do You Need?
-
Installed Sample Database Application Packaged App
Creating Users
This section of the tutorial is applicable only for applications that use Oracle Application Express Authentication.
If your application is configured to use Oracle Application Express Authentication, you may use the functions already available in Oracle Application Express to create new users. Application Express allows you to create new users in bulk.
In this section, you create new users and in the next section you restrict access to certain areas of the application to certain users.
-
In the Application Express login page, enter the following login credentials and click Sign In:
Workspace: obe
Username: obe
Password: oracle
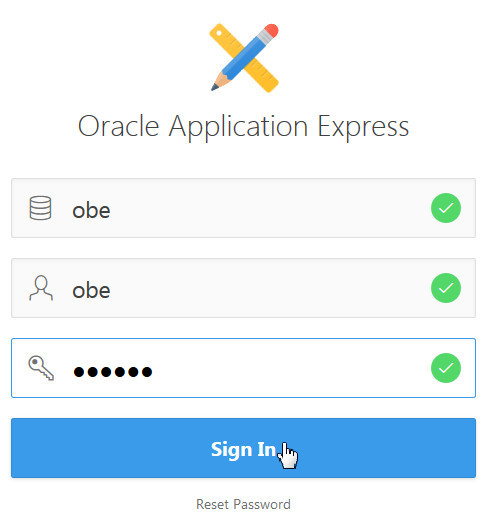
Description of this image -
From the Oracle Application Express home page, click the down arrow next to Administration, and select Manage Users and Groups.
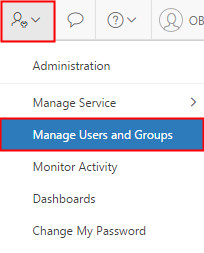
Description of this image -
Click Create User >.
-
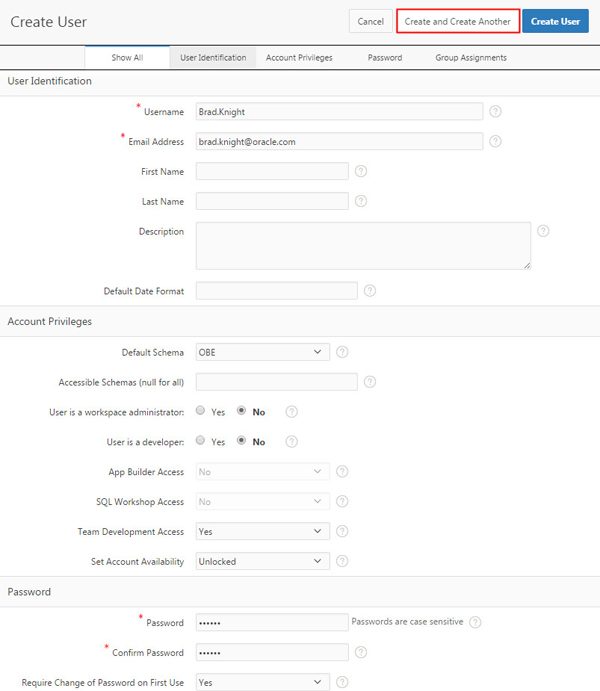
Enter the following information:
Note: Make sure that there are no trailing spaces in the username and password.
-
Username:
Brad.Knight -
Email Address:
brad.knight@oracle.com -
Default Schema:
<your_schema_name> -
User is a workspace administrator:
No -
User is a developer:
No -
Password:
<choose_a_password> -
Confirm Password:
<repeat_your_password>
Note that while creating users, you have a choice to provide access to Team Development Module. By default, developers get access to Application Builder, SQL Workshop, Websheet Development, and Team Development Module.
Note: In this OBE, you accept the default Yes for Require Change of Password on First Use. Therefore, when you log in as this user later, you will be redirected to a screen where you specify a new password. You can then re-login using the new password.
Click Create and Create Another.
Description of this image -
-
Enter the following information and click Create and Create Another.
-
Username:
Susie.Parker -
Email Address:
susie.parker@oracle.com -
Default Schema:
<your_schema_name> -
User is a workspace administrator:
No -
User is a developer:
No -
Password:
<choose_a_password> -
Confirm Password:
<repeat_your_password>
Note: In this OBE, you accept the default Yes for Require Change of Password on First Use. Therefore, when you log in as this user later, you will be redirected to a screen where you specify a new password. You can then re-login using the new password.
-
-
Enter the following information and click Create User.
-
Username:
John.Bell -
Email Address:
john.bell@oracle.com -
Default Schema:
<your_schema_name> -
User is a workspace administrator:
No -
User is a developer:
No -
Password:
<choose_a_password> -
Confirm Password:
<repeat_your_password>
Note: In this OBE, you accept the default Yes for Require Change of Password on First Use. Therefore, when you log in as this user later, you will be redirected to a screen where you specify a new password. You can then re-login using the new password.
-
-
Notice that three new users are created.
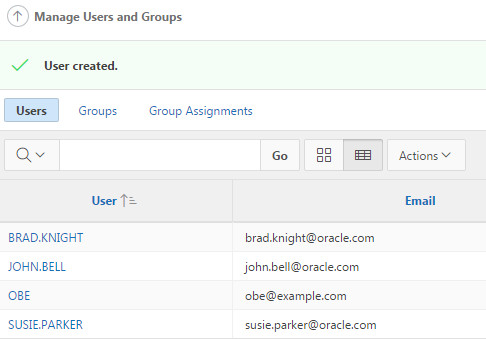
Description of this image -
You now set up administrator access to the application. Click the App Builder tab.
Restricting Access
Now that you have users defined, you can restrict access to certain portions of the application. In this section, you allow only certain users to edit tasks.
Add an Access Control Page
You create an Access Control page to secure the application so that only privileged users can perform certain operations. In this page, you define which user can access which part of the application.
-
In the App Builder home page, click Sample Database Application.
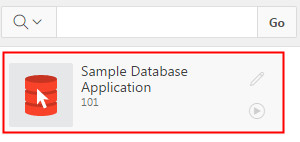
Description of this image -
Click Create Page >.
-
Select Access Control as page type.
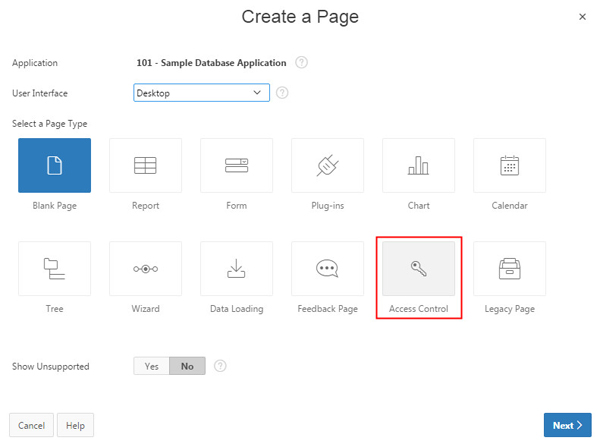
Description of this image -
Accept the default values and click Next >.
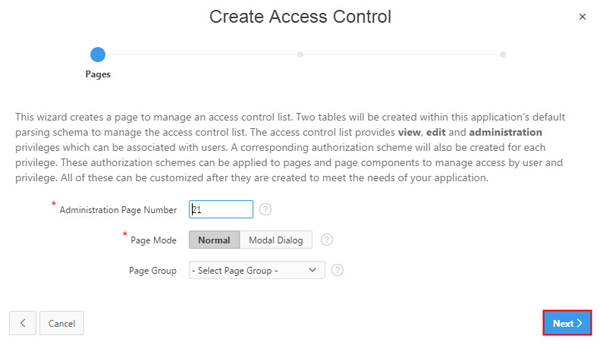
Description of this image -
For Navigation Preference, accept the default value of Do not associate this page with a navigation menu entry and click Next >.
-
In the Confirmation step, click Create.

Description of this image -
The page loads in Page Designer view. Click the Save and Run Page button.

Description of this image -
Enter your login credentials and click Sign In.
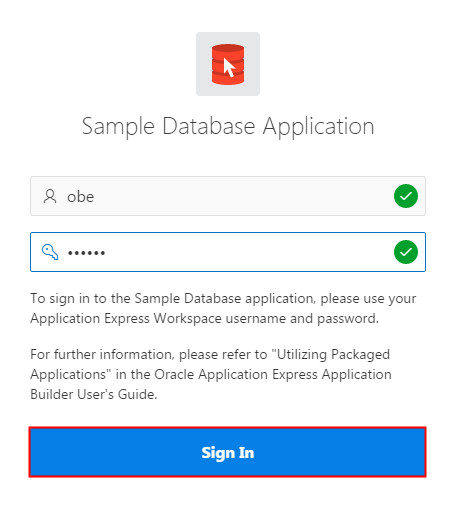
Description of this image -
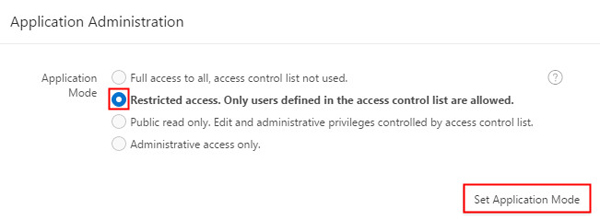
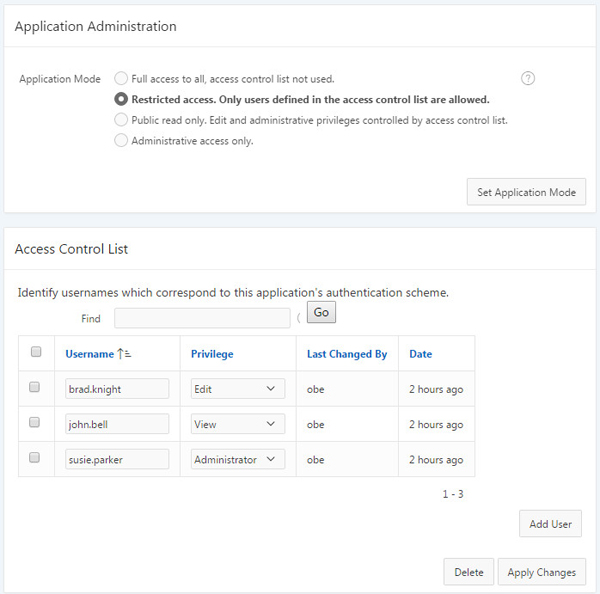
You see the Access Control Administration page that you added to the application. The page is divided into two regions, and the default setting for Application Mode is Full access to all, access control list not used. In this case, you want to restrict certain users from certain parts of the application.
Select "Restricted access. Only users defined in the access control list are allowed." and click Set Application Mode.
Description of this image -
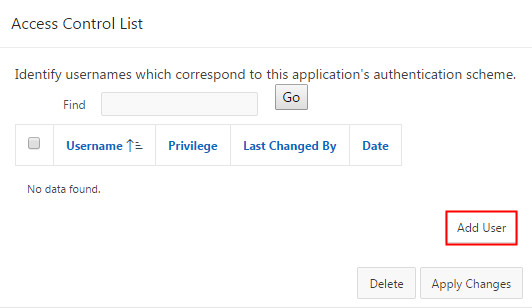
The Application mode has been set. In the next section, you identify your privileged users. Click Add User.
Description of this image
Identify Privileged Users
Earlier, you created 3 users - Brad.Knight, John.Bell, and Susie.Parker. In this section, you identify Brad.Knight to be allowed to edit information in the application, but he cannot change any user's access. John.Bell can only view the information in the application, but cannot make any changes. And finally, Susie.Parker is the administrator of the application so she can change anything in addition to changing the user privileges.
-
Enter
john.bellfor Username and select View for Privilege. Then, click Add User again. -
Enter
brad.knightfor Username and select Edit for Privilege. Then, click Add User. -
Enter
susie.parkerfor Username and select Administrator for Privilege. Then, click Apply Changes.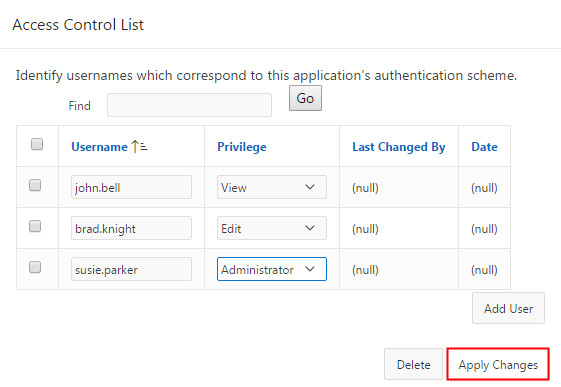
Description of this image -
Next, you define which areas of the application are restricted. Click the Application<n> link from the developer tool bar.

Description of this image
Apply Authorization Schemes to Application Components
With your authorization scheme created, users with View privilege can review the Orders but cannot change or place orders. Users with Edit privilege can make changes to the Order Information and place new orders, but cannot make changes to the access control list. Users with Administrator privilege, can make any change and addition, including to the access control list.
-
Click Edit Application Properties.
-
Click the Security tab.
-
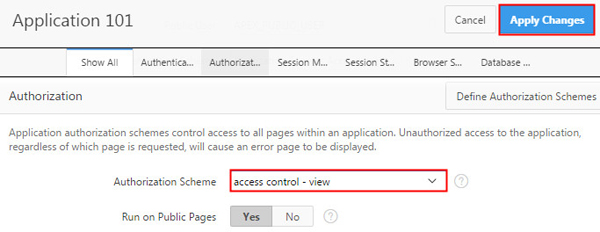
Under Authorization, change the Authorization Scheme to access control - view and click Apply Changes.
Description of this image -
Now that you have given access to the application for view privileged users, you can restrict users to Orders information. Click Page 4 - Orders.
-
In the Page Rendering section, locate and expand the Orders report Columns node.
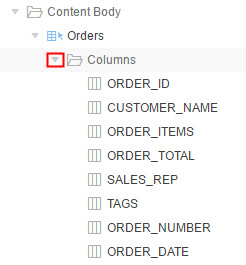
Description of this image -
Click ORDER_NUMBER.
-
In the Column section, select access control - edit for the Authorization Scheme and click Save.
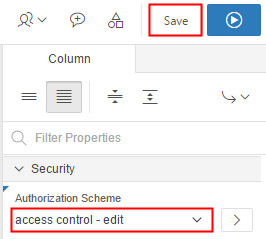
Description of this image -
The Place Order button should only appear when the user has Edit or Administrator privilege. To enable this, you need to set the authorization scheme for the Place Order button.
In the Page Rendering section, under Region Buttons node, click ENTER_NEW_ORDER.
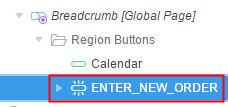
Description of this image -
In the Button section, select the access control - edit for Authorization Scheme and click Save.
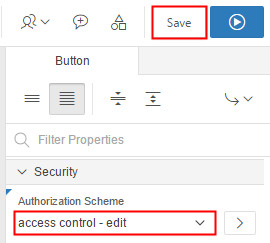
Description of this image -
A user, in spite of not having edit privilege for editing or placing orders (on page 4), may still be able to access the restricted pages 11,12, 14, and 8 (Place Order wizard) by entering the direct URL in the browser.
To prevent this from happening, you need to restrict pages 11, 12, 14, and 8 to only edit users. Select Page 11 from Page Finder.

Description of this image Note: In the Sample Database Application, pages 11, 12, 14, and 8 open in a modal window due to which a user will not be able to open the page directly by providing the direct URL to the page. A user can only open pages that open in Normal mode by using the direct URL.
-
In the Page section under Security, select access control - edit for Authorization Scheme and click Save.
You may change the page mode (under Appearance) in the Page section to Normal to test that the page is restricted by direct URL for users that are not a part of the access control - edit authorization scheme.
-
Repeat step 10 and 11 for pages 12, 14, and 8.
-
Since users with the administrator privilege are only allowed to make changes to the access control list, you need to set the authorization scheme for the page. From the Page Finder, open the Access Control Administration page.
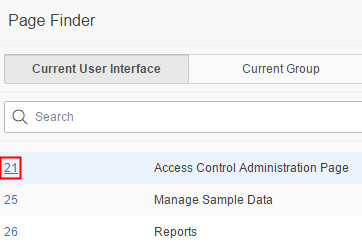
Description of this image -
In the Page section under Security, select access control - administrator for Authorization Scheme and click Save.
-
From the Page Finder, open Page 101 Login Page. Run the page by clicking the Save and Run Page button.
-
If you're already logged in, click the user icon and Sign Out. Enter brad.knight's username and password, and click Sign In.
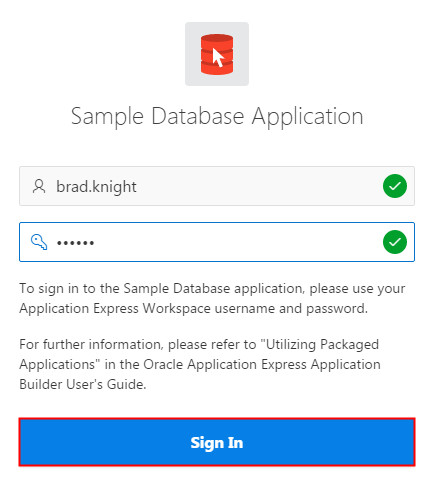
Description of this image Note: If you're signing in as brad for the first time, you will receive a prompt to change your password. Enter you current password, your new password, and click Apply Changes. Then, login as brad.knight using your new password.
-
Use the left navigation menu and navigate to the Orders page.
-
Click the Order # of any record to edit the information.
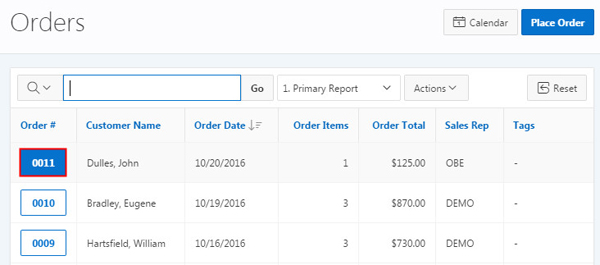
Description of this image Notice that Brad can edit the Orders information and can see the Place Order button. Close the Order Details modal window, click the user icon, and Sign Out.
-
Login as john.bell and navigate to the Orders page.
Note: If you're signing in as john for the first time, you will receive a prompt to change your password. Enter you current password, your new password, and click Apply Changes. Then, login as john.bell using your new password.
-
John has only view privileges and therefore cannot edit the Orders information. Also, he does not see the Place Order button.
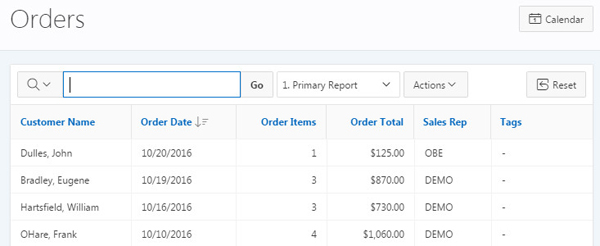
Description of this image -
Change the page number in your URL to try and access Page 21 Access Control Administration (page number may be different for you).
Example URL
.../f?p=101:4:1998477483740:::::
Change to.../f?p=101:21:1998477483740:::::Press the ENTER key on your keyboard. Notice that you receive a message denying you access to the page because you restricted Page 21 to administrator privilege users only. Click on the Application<n> link in the Developer tool bar.

Description of this image -
From the Page Finder, open Page 101 Login Page. Run the page by clicking the Save and Run Page button.
-
Login as susie.parker and navigate to the Orders page.
Note: If you're signing in as susie for the first time, you will receive a prompt to change your password. Enter you current password, your new password, and click Apply Changes. Then, login as susie.parker using your new password.
-
Click the Order # to edit the information.
Description of this image Notice that Susie can edit the Orders and can see the Place Order button.
-
Change the page number in your URL to try and access Page 21 Access Control Administration (page number may be different for you).
Example URL
.../f?p=101:4:1998477483740:::::
Change to.../f?p=101:21:1998477483740:::::Press the ENTER key on your keyboard. Notice that susie has access to the Administration page.
Description of this image